The steering knuckles are possibly the most neglected moving part on an Oka. With a bit of regular greasing they are quite reliable and just sit there and rotate in response to the steering wheel while soaking up all the road shocks thrown at them.
But they are fairly critical items and there are potential wear points which need occasional attention:
- The nylon bushes around the upper king pin gradually wear, allowing the wheels to lean in (negative camber).
- The bearing race at the bottom of the knuckle supports all the weight of the Oka, and since they sit for long periods in substantially one direction, the rollers can pound grooves in the bearing cup.
- The grease seals in the top and bottom joints can wear and allow the ingress of water and dust.
- The "C" ends of the axle tube can deform slightly causing the wheels to show a negative camber (lean inwards at the top).
- The steering arm holes can be worn oval by loose tie rod ends
These problems can be solved quite effectively with a bit of maintenance at the same time as the wheel bearings are being inspected and repacked with grease. To start the process:
- Remove the wheel, brake calliper, free wheeling hub, spindle locking nuts and washers.
- Withdraw the hub and wheel bearings,
- Remove the spindle, brake calliper plate and dust protector.
- Remove the top king pin cap (nuts on the RHS or bolts on the LHS steering arm). Loosen nuts/bolts progressively, the caps have strong springs under them.
- Withdraw the axle shaft to inspect the UJ and inner splines.
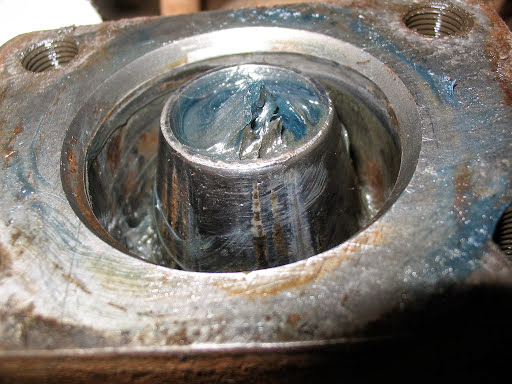
The king pin exposed after removing the top cap, nylon bush and spring.

The top nylon bush with some thinning visible on the top right. This one is only a few years old and will be OK for a few more yet.
After removing steering tie rod, the top cap and lower bearing support, the knuckle can be pulled out at the bottom and fiddled over the king pin. Be careful not to damage its surface.
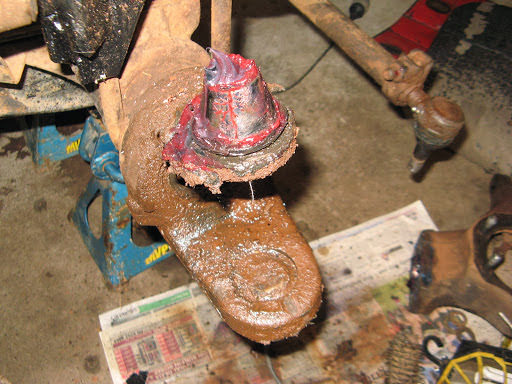
A dirty “C” end of the axle after removal of the knuckle.
After removing the steering tie rod, the top cap and lower bearing support, the knuckle can be pulled out at the bottom and fiddled over the king pin. Be careful not to damage its surface.
The lower bearing and worn oil seal will probably drop out or can be pulled out after removing the knuckle. The bearing cup and dust cover can be carefully tapped out using a large screw driver around the edges of the dust cover.
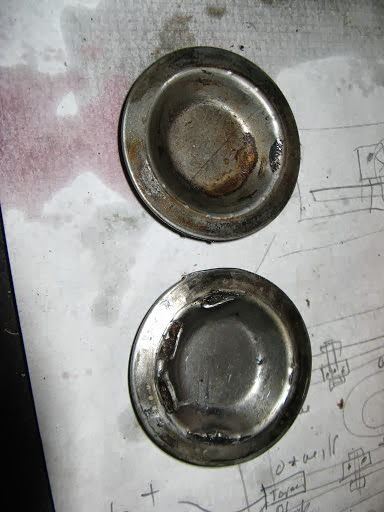
When knocking out the bearing cup, ensure the driver doesn’t slip off the edge of the bearing or it can penetrate the thin dust cover (as in the lower picture). Knock any sharp edges flat and put a smear of gasket goo over the top of the cap after assembly. This will keep water off and prevent rust as well.

And after being cleaned up a bit and the bearing cup and dust cover removed. If the king pin is still smooth and not rusted or pitted, it can be reused (replacement is apparently only possible by those with super-hero strength anyway).
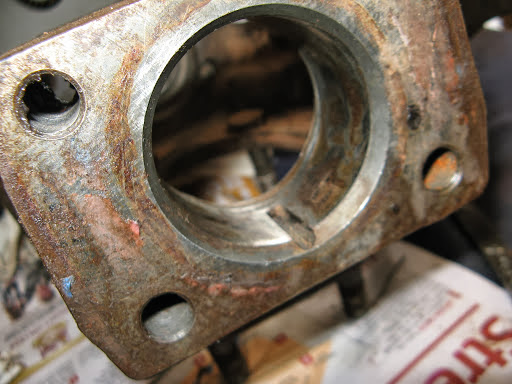
Check the inside of the top of the knuckle for wear from the nylon bush.
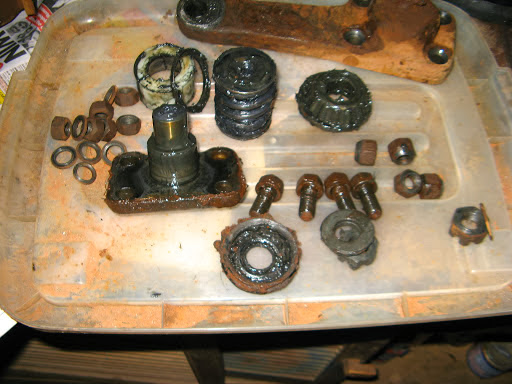
Some of the greasy knuckle components. The top cap on the LHS is part of the steering arm.

The bearing cup showing signs of wear grooves caused by the pounding of stationary rollers.
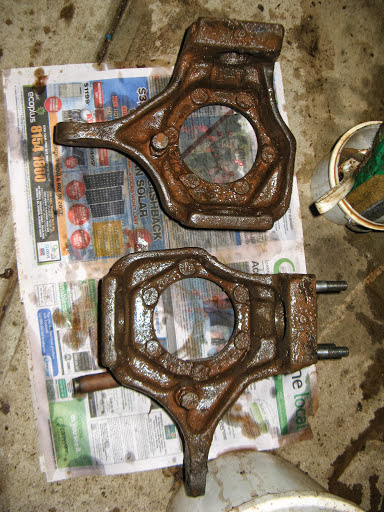
Steering knuckles removed (obviously) and being cleaned of kgs of greasy mud.
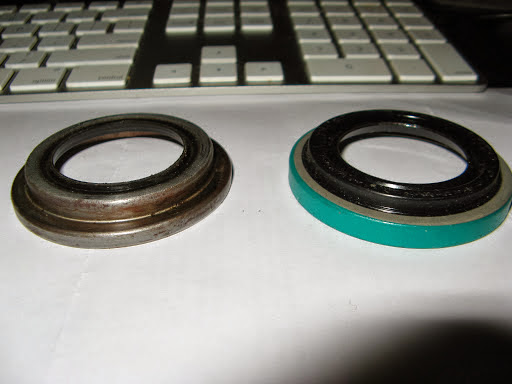
The bearings can be bought locally but the oil/grease seals are very difficult to source locally and may not be the same size, although they still fit.
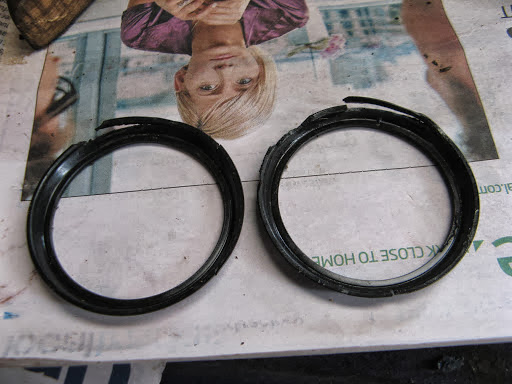
The upper seals are difficult to find but are not too critical . The old ones can be reused if you trim off any tatty edges.

Hold the dust cover up with a magnet while installing the bearing cup from below.
The bore for the bearing was about 20thou out of round, probably stretched due to the 1/2 million km of stress. I chilled the cup in the freezer but it still needed a lot of heat to expand the arm sufficient to allow the cup to be tapped in from below, open side facing down.
Tapping the cup flush in the arm is OK with a block of hard wood and a hammer, but it needs to be recessed a further 5mm for the oil seal. You can use an old cup as a driver but be careful that it doesn’t get jammed in because it’s a bugga to get out. It probably doesn’t matter if the cup isn’t fully home as the weight of the Oka will push it in and the the top spring and nylon bush will take up any slack.
Fully grease the new bearing and insert it together with the oil seal up behind the bearing cup. The old cup can safely be used for that purpose.
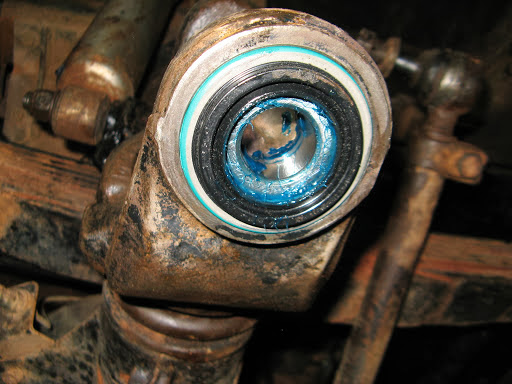
The fully greased bearing and seal refitted into the lower arm.

With the knuckle reassembled, check that grease pressure doesn’t start popping the seal out when regreasing the bearing. If it moves, it can be levered back in with a couple of screwdrivers.

The knuckle reassembly complete. Loctite the top and bottom bolts, fit new spring washers and torque to 80 ft-lbs.

Because the wheels were leaning in (negative camber) due to slight bending of the “C” ends of the axle tubes, I fitted camber correcting wedges before reinstalling the spindles.

I also smeared gasket goo over the dust cover to prevent water lying there and causing rust.
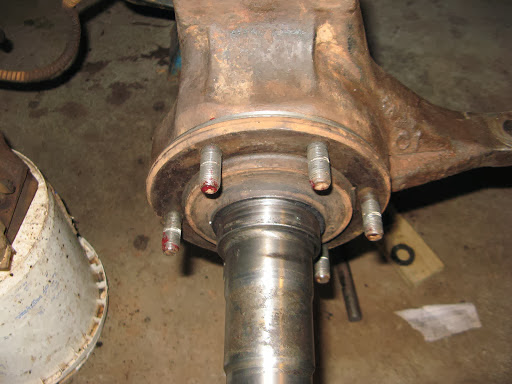
The spindle and camber shim in place.
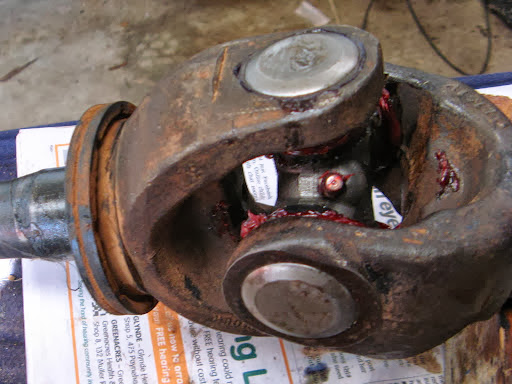
Before reinstalling the axle shaft check and degrease the UJ. These UJ’s take a lot of torque, more than the drive shafts UJ’s due to the 4.88:1 torque multiplication ratio of the differential. The must also transmit that torque while operating at acute steering angles. One of mine was dry and showed signs of wear so it was replaced.

Before installing the axle shaft I cleaned the end and wound a couple of turns of waterproof tape around the shaft in the area that the inner seal lip contacts the shaft. This is to try to reduce the inevitable oil leakage from the diff housing due to stretching of the seal. It might not work but it’s worth a try and certainly easier than replacing the inner seals.

Install the axle shaft by sliding it along a length of plastic strip to stop it picking up dirt and transferring it to the diff gears.

The brake calliper plate, disk protector and spindle back together with nuts Loctited and torqued up to 60ft lbs.

After repacking the bearings and fitting a new rear hub seal, the hub was reinstalled using my new Stage 8 spindle nuts. The first couple of tries were a bit fiddly but certainly less frustrating than the tabbed washers they replaced, and will make removal of the hub a lot easier in future.
A ring of grease was inserted around the bearing area to reduce the ingress of water.
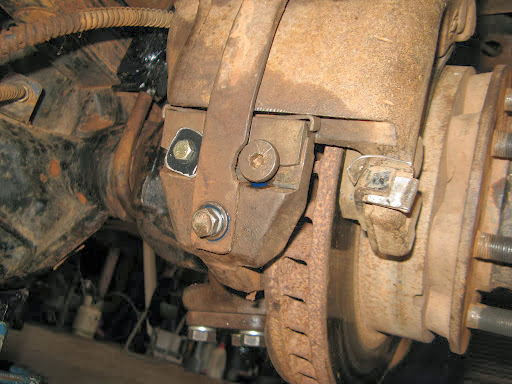
There is provision for 2 bolts on the brake calliper keys in but only one hole in the calliper plate so I drilled and tapped anther hole to add some assurance that the key can’t vibrate loose.
Notes:
1) The thick strap across the calliper is a valuable addition to ensure the calliper can never fall off. It requires fixing holes to be drilled and tapped in the calliper frame.
2) The steel packing pieces around the ends of the brake pads reduce the movement (slop) of the pads when the callipers have worn somewhat.
3) Replace the spring clips under the lower tab of the rear pads to stop them rattling.
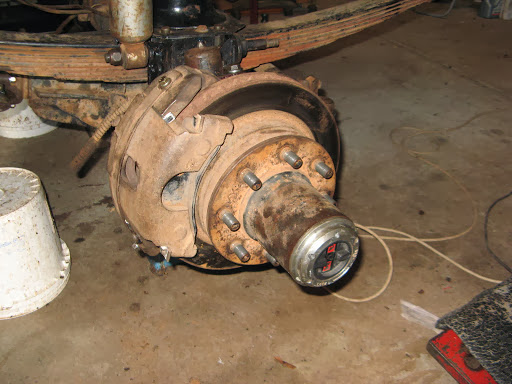
The hub all back together with a free-wheeling hub.
The final task was to reconnect the steering rods, which is a bit tricky since the tie rod hits the bottom of the spring before the bolt can clear the knuckle.
Turning the wheels fully inwards just enables sufficient clearance to be obtained. I also replaced the torn and tattered rubber boots while I was refitting the tie rod ends, and then greased all the joints.

One bolt hole in the LHS knuckle had been worn oval shaped due to a loose nut and to fix this I inserted some shim around the bolt and tightened it firmly to hold the shim in place. Eventually the hole will need to be reamed out and a bush fitted to regain the original round tapered shape.
TBC when it’s all back together and tested...